Tuesday, April 8, 2014

Easy Spring Décor

 
In my powder room, I have a frame that holds chicken wire. I use it to add a little touch of seasonal décor to the tiny room. I usually find a greeting card that I like and then cut it apart so I can show the front of the card as well as what might be written inside. It a simple way to bring the season or holiday into another room of the house. I use clothes pins to hold the card in place.

Originally I was using the first set of five clothes pins that I decoupaged with craft paper to match the room.

As each season rolls around, I’ve been trying to change the clothes pins as well. I bought a package of 50 at Wal-Mart of just a few dollars.
To get ready for spring, I pulled out three new clothes pins and put a quick coat of yellow paint on the top side.
 
 
 Then I used some rubber stamps that I picked up from the dollar bin at the craft store. With a little dab into ink then were ready to go.
 

I love projects that I can prep, finish and clean up so quickly. It’s a great way to get motivated for a bigger project too.

Wednesday, April 2, 2014

Foolish Fun

After all the Leprechaun mischief it would be impossible to allow April fool’s day to go by without a little trickery.
For the past few years, I have been playing food games with the kiddos. Now we are to the point where they are looking forward to Mommy’s antics.
So far my April fool pranks have been a twist on what they are giving at meal time.
This year they started their day off with a fried egg…
That’s an egg, right?
 

Well, since they are not really fond of fried eggs, I gave them yogurt and half of an apricot. (Healthier than the white chocolate eggs they got last year.) Being that they were not sure what it was at first, there was some hesitation for the first few bites but then they caught on.


Ops, Mommy forgot to pour your milk. Here ya go… What the????
A drop of food color in the glass before they came down to the table and I was prepped for trick number 2.
Off to school after a few; “Your sock is untied” and “There’s a bug on your nose” and then I was busy plotting my dinner plans.


Jell-o in a drinking glass with a straw makes for some “hard to drink” juice. (I’ve done this one before but they love it)

For the entrée I made “pasta” I put some off-white icing in a piping bag. I chilled the bowl first so the icing would hold shape nicely. Then I filled the dish with “squiggles” (that’s a technical term).

 
Now for the meatballs and sauce I used Ferrero Rocher Chocolates and seedless red raspberry jam.

 
The only thing missing was a veggie. Oh but wait…I have the perfect fix.
Broccoli!!
 
I grabbed a handful of green tootsie rolls from the “pick your own” candy bin, borrowed a tablespoon of icing from the “pasta” (added a few drops of food color) and then finished the look with some dark green jimmies.
 

I popped the unwrapped tootsies rolls in the microwave for 5 seconds to soften them up slightly. Then I sliced halfway down each one and pulled the side out like tiny tree branches. Dip the cut ends into colored icing then into the jimmies and you have...

 
broccoli tops!!


The kids were thrilled with the not so healthy dinner. But what kind of Mom would I be if that is all I had them eat??? They had to have dessert too!! What better dessert than meatloaf cupcakes?


Sounds gross right?

I make a meatloaf but shaped it into cupcake sized balls and baked. Then when they were ready, I put them into a cupcake paper and cover them with (blue) mashed potato icing.

I did manage to get the “pasta” away from them while we ate our “cupcakes”. After dinner, we used Nilla wafers to scoop the pasta up for a tasty treat.

The effort is well worth it to see those smiling faces and hear them laugh and joke with each other. They have been warned that next year’s tricks will be slightly more devilish… Mwahh ha ha haaa….

Monday, March 17, 2014

Leprechaun Mischief

 
My kids look forward to Saint Patrick’s Day every year.

We have a few traditions that make the day (and the day before) filled with fun.

First we make treats for their classmates.


 I melt white chocolate morsels and stir in a few drops of green food coloring then we dip pretzel sticks in the chocolate and sprinkle a little green sugar on top.


Wrap them up and add a sticker and they’re ready to go.


Then we have to make our rainbow cake! I decorate the top with colored sugar to look like a rainbow with a pot at the end. We set that out to see if our Leprechaun will give us some gold coins. (He comes to visit us during the night and wreaks havoc in my house.)
 
Today we found that he peed green in the potty and didn’t flush. (URG!!!)
 He moved the collection of shoes from the front door to the middle of the room. He moved several of my decorations around…things from the kitchen went into the living room and vice-versa.


The worst is, he brings “Lucky Charm” cereal with him. (Mommy doesn’t buy that kind of cereal)

Of course he makes a mess with it and even added a few toys in for the fun of it. (Those are Lego houses and 3 Lego people in a canoe)


We must make him happy because he gave us gold coins (chocolate ones naturally).


The fun is not over yet…

After school the kids will go on a scavenger hunt and end finding these.


And for dinner I will make Leprechaun quesadillas. (You’ll have to wait to see those)

I hope my kids learn to add some mischief into their lives and remember how to have fun with everyday things.

Happy Saint Patrick’s Day!!!

Saturday, March 15, 2014

Saint Patrick's Day Shirts


I’ve been making festive t-shirts for my kiddos for years. This time around I thought I would give the reins over to them. I have to say, I think they did a pretty good job.

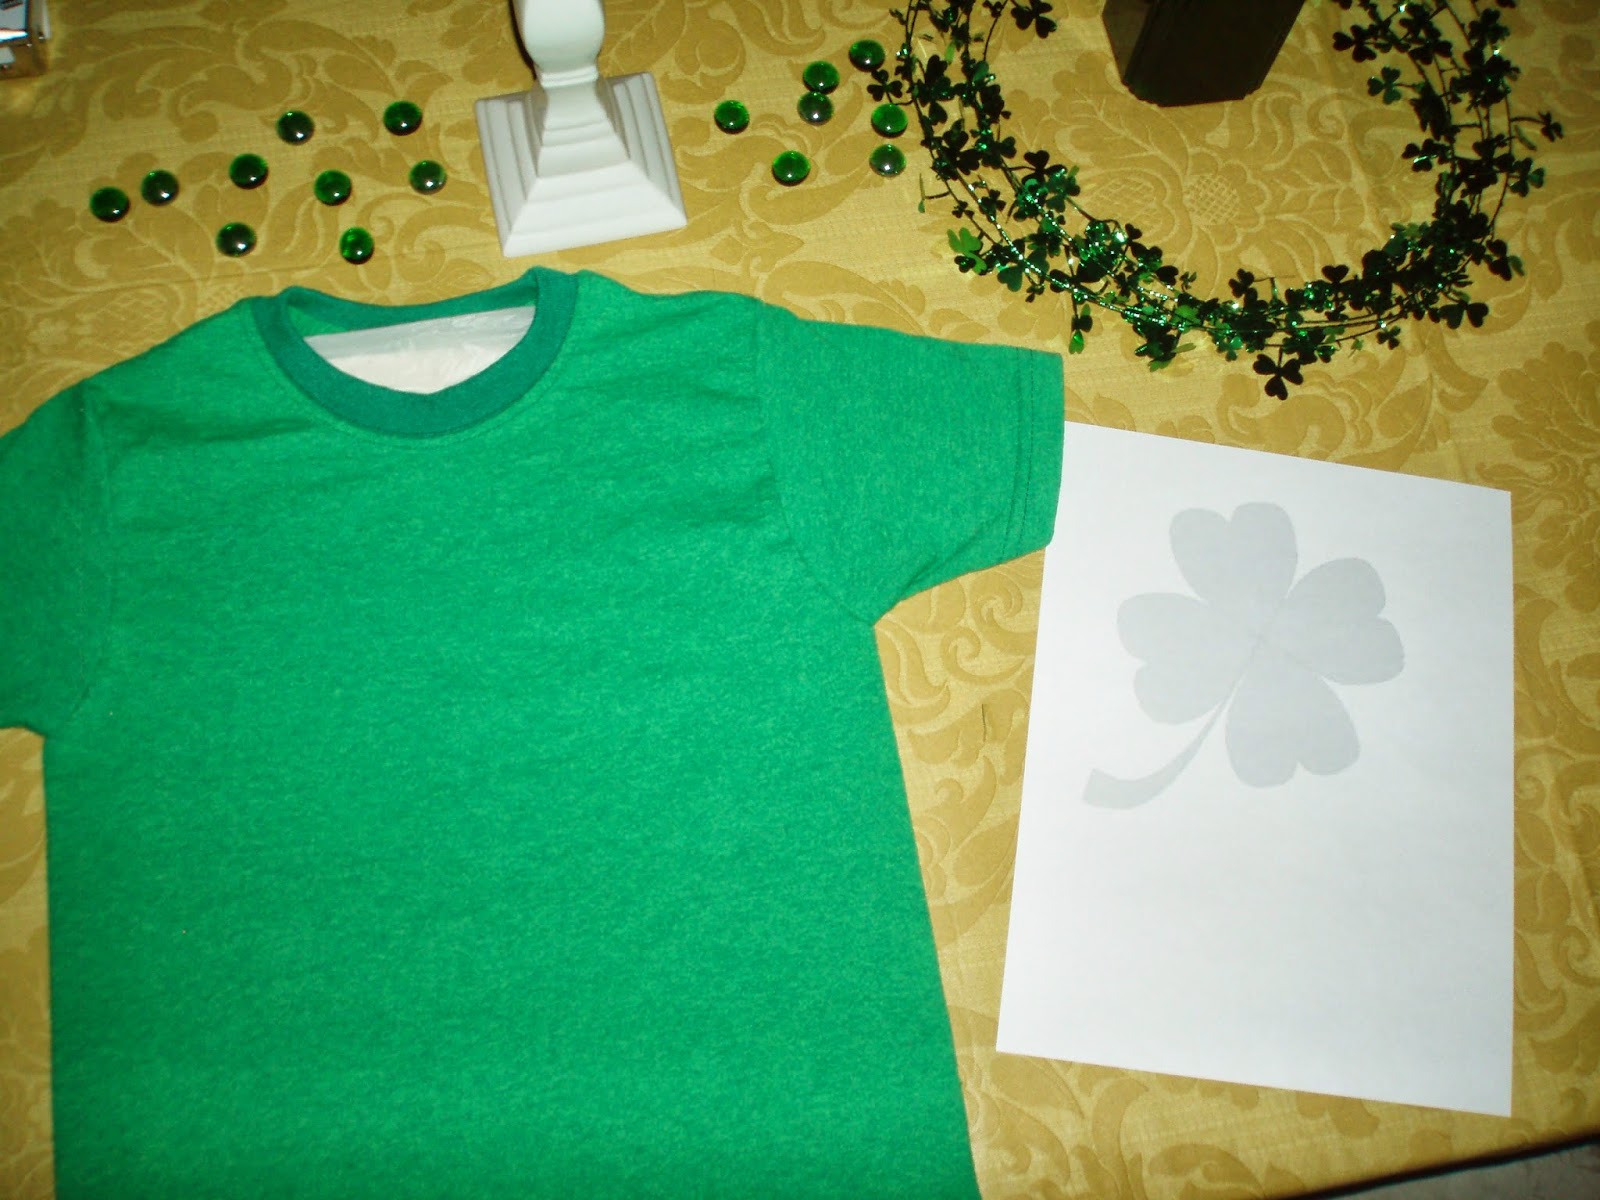
What you need to make one yourself….

T-shirt (I usually pre-wash)
T-shirt form (I made my own from cardboard and covered them with plastic bags)
Paper plates
Fabric paint
Pencils and/or sponge dabber
Pattern (I copied an image from google and cut it out of cardstock)
Glue stick


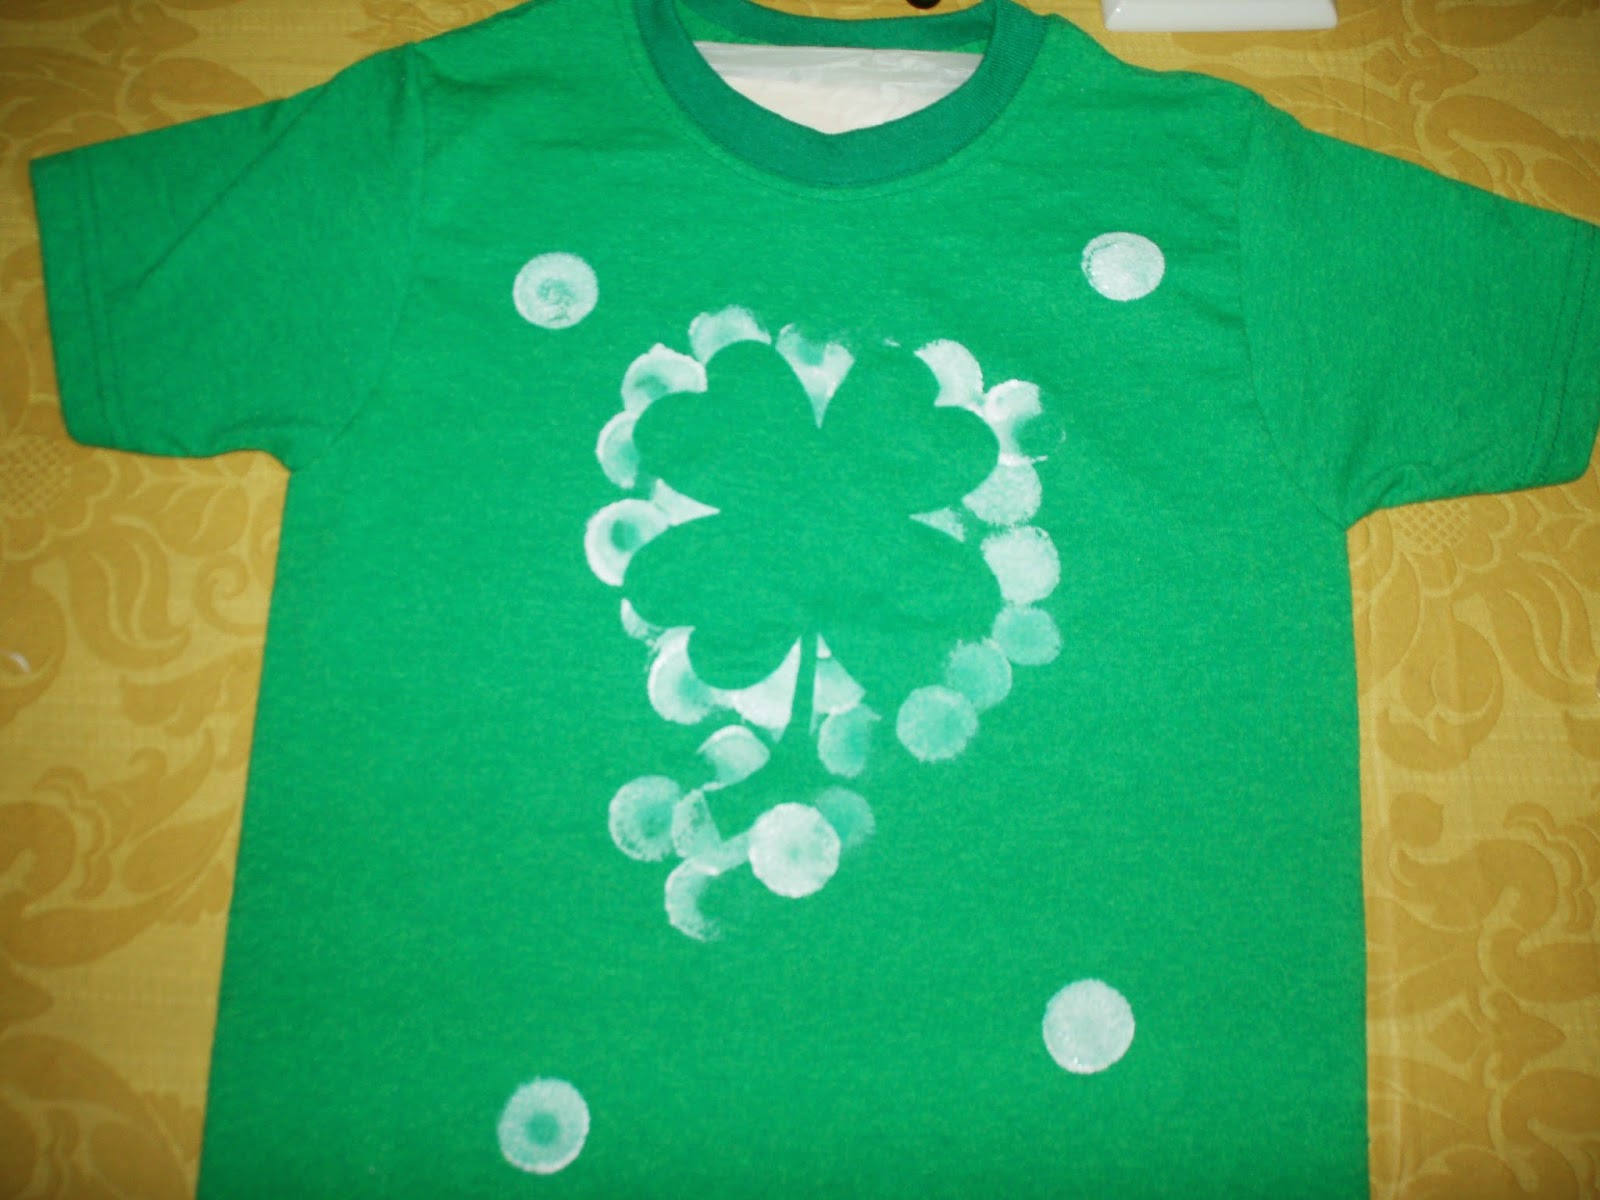
My son made his on a green shirt with white paint.
My girls made theirs on white shirts with different shades of green paints.
 
Slide your shirt over the t-shirt form to keep your fabric smooth and flat. This will also keep any paint from go through to the back of the shirt. Print out an image the size you need, cut it out and use the glue stick to hold it in place on your shirt while you work.
Put a little bit of paint on a paper plate and you’re ready to start dabbing around the edges of your pattern. As soon as you are done painting, peel the paper pattern off and set aside to dry.
 
Oh the concentration.

Working hard.

Thinking, thinking, thinking.

Ta-da!!
 
 
Voila!!! Job well done.


Wednesday, February 19, 2014

Homemade Ice Pack

 
While I was flipping through the January 2014 issue of Women’s Day, I came across a page listing a few clever ideas for sponges. The one I liked the most was for a homemade ice pack. With three kids running around someone is always bumping into something hard (sometimes another person). The majority of the time they just need a little T.L.C. and attention for a minute. A “boo-boo pack” and some love from Mommy and they are back on their feet and running again.

We used to have a few of those gel packs that we kept in the frig but over time, they cracked or started leaking and needed to be tossed out.

The other day I picked up a package of sponges and thought I would try to make my own.


I dripped a few drops of water onto each one then slid them each into a zip closed baggie. I put one in the refrigerator and two into the freezer.
 
The one in the frig works fine but it doesn’t stay cold for long (or so it seems to me). The ones in the freezer were nice and cold and stayed that way long enough to sooth a minor bump. However, the frozen sponge wasn’t flexible and made it a little challenging to surround the injured area.


A quick thaw and I used a serrated knife to cut into the sponge some, so that it will be more flexible and able to encircle curved areas.


Do you have any clever ideas for re-purposing a household item?

Friday, February 7, 2014

Cabin Fever


School delays and cancellations, icy roads, mounds of snow, brutal cold, post-holiday slump, winter blues, whatever the reason, it’s easy to feel a little depressed or down in the dumps this time of year. There are a few ways to break that cycle.

One is to get a little sun. Now sure, it would be nice to fly off to some tropical location and sip rum punch with your toes in the sand but not too many people can afford it or fit that into their schedules. Those diagnosed with seasonal affective disorder are prescribed “light therapy” to help boost their mood. Seeing your doctor might be something to consider if you feel you need more than the proverbial pick-me-up to get out of your slump. Natural sunlight would be great but it can be hard to come by and we need to rely on Mother Nature to cooperate.

Another option is to get some exercise. It’s a natural and healthy way to lift your mood. Picking up a winter sport is a good idea especially this winter. However, if being out in the cold is not your cup of tea and part of what might have you down in the first place then swishing down the slopes may not be the best answer for you.

My favorite go-to fix for the blues is to socialize. It’s easy to hibernate and become a hermit when your spirits are low. Isolating yourself can start you on a downward spiral that can be really difficult to climb free from. Socializing can be as easy as calling a friend. Not to cry on their shoulder but ask them all sorts of things about their life. Give them the chance to lean on you. Hearing how someone else is feeling can make you feel less alone and make you feel good about yourself for being a support for another person.

You can take it up a step from there and invite a few people over. This is a great time to have a party. (It only takes three people to call it a party). Get a few drinks and set out some snacks and you’re ready to go. Ask your guests to bring an appetizer over and add a theme to your evening and they’ll be talking about how much fun they had for weeks.

There are so many fun ways to add a theme now. Fight the blues and have everyone wear something blue. Write down some conversation starting questions and put them in a basket to help “break the ice”. (Pun intended). Call all your single friends and host a non-traditional Valentine party. With the Olympics starting, you have a readymade theme. Have your guests dress in red, white and blue or ask them to bring an ethnic food to share. Pull the names of various countries out of a hat and each guest gets to cheer for a different team.

Whatever you do find a way to have some fun, put a smile on your face and warm your heart.

Sunday, February 2, 2014

Valentine Theme Party Crafts

With less than two weeks to go before Valentine’s day and I’m busy getting organized for the classroom party. Here are two of the craft projects I’m planning.
The first one is an “I {heart} to read” bookmark.
 
While looking for ideas on pinterest, I saw this idea for making a colorful heart garland and it inspired me to think of a way to make a valentine themed bookmark.
I have to say the hardest part was getting the paint chips. I feel like they are watching me and they know I have no intention of painting. I’m sure it’s a matter of time before we have to pay a deposit to take these things out of the paint store. There are just too many cute crafts you can do with them.
 
Since most of the red was already gone, I gathered an assortment of colors. I picked up a little heart punch from the dollar bin at the craft store.
I punched a little heart out of each color on each of the paint strips.  I saved the dark shades for another step in the project.
I printed out a sheet of cardstock that says “I (space for a heart) to read”.


I cut this statement into small tags. Then I glued the colored hearts into the open space and punched a hole at the end of the tag.

 
I cut some ribbon into 12 inch pieces. During the party, the kids will pick the color paint chip they like, then pick an “I (heart) to read” tag and tie them together with the ribbon. If you have older kids and/or more heart punches I’m sure the kids could do more of the work.


One of the other crafts I have ready to go is a Heart Lei
Thanks again to pinterest, I found this paper wreath project.
I’m using softer paper and stapling rather than hot glue. (I try not to do too much with glue…takes too long to dry) I’m also making mine longer so it’s not round but will hang more like a necklace.
First cute your paper into one inch strips then fold them in half.


To start, open one folded piece and turn it around. Bring the end s together and place them inside the fold of the next piece. Use a stapler to secure the papers together.


 Now take the end of the second piece and bring them down until they touch. Now tuck them into the fold of the next (3rd) piece and staple.

 
 Continue until you have enough hearts connected. It takes about 14 for a kid size necklace.


Ok, I’m off to see what I can get myself into next…